
It makes sense to start the blog with a post about the elephant in the room. This post, and the ones that will hopefully follow, would not have had a place on the web without GitHub and its Pages. Well, there might have been other venues to air them, but none that I know were as easy to use as GitHub Pages.
In this post, we will discuss how to get started with git and GitHub. You, the reader, might want to complete some prerequisites before you can follow along. For the sake of clarity, I will list the requirements in the following subsection.
Prerequisites:
- Download and install
gitfor Windows/Linux. This link should (or did at the time of writing this post) take you to the webpage where you can downloadgit’s Command Line Interface (CLT) client1. After successfully downloading the executable file, follow the installation wizard to getgitinstalled on your system. - Register a free
GitHubaccount2.
Start on GitHub:
You can always add version control (in the form of git) to an existing project at any time. On this occasion, we will start our version control (GitHub repository) before we create/script any project-related files.
- Login to your
GitHubaccount. - Locate the plus
+sign on the top right corner of the page and selectNew repository. - On the next page, give your repository a name under the
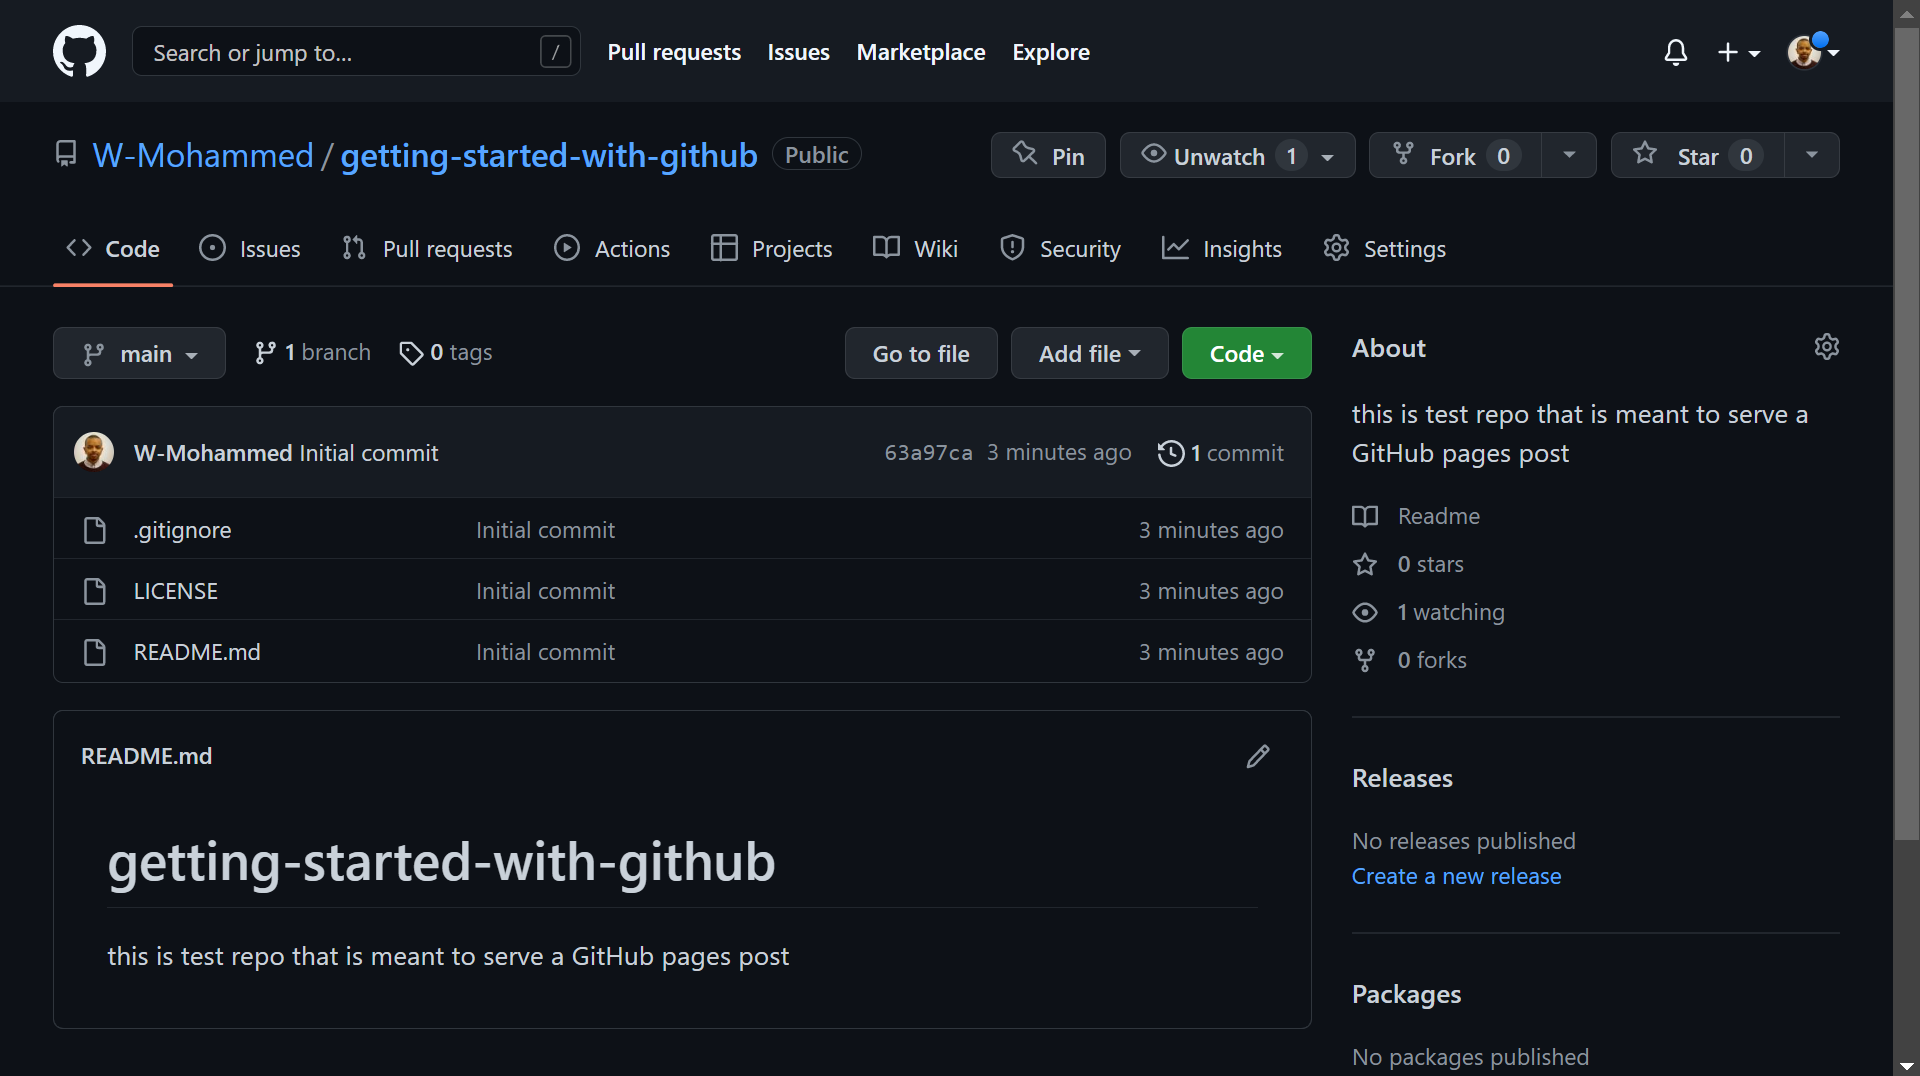
Repository namefield3. I will call this repository getting-started-with-github. - You can add a few sentences to the Description field. I will add this is test repo that is meant to serve a GitHub pages post.
- Choose between having your repository Public for anyone to see or Private for you to invite people to view and/or contribute. I will make this repository Public so that you, the reader, can access it.
- Check the box next to the
Add a README filesoGitHubcan create that file for you. - Next, we can add a
.gitignorefile to our project repository. A.gitignoreis a utility file that helpsgitkeep track of the files you want it to ignore4. I will choose a.gitignoretemplate for the statistical programming language R. - Finally, to finish creating this repository you, can choose a license to govern the use of its contents by other users. I will select the
MITLicense5 for this repository. - Click on
Create repositoryand wait a second forGitHubto create your repository.
A new webpage should now load, and you should see your repository with three files (.gitignore, LICENSE and README.md). Also, just below these files, you should see the contents of the README.md file.
Some code
# load plumber
# library(plumber)
githas both CLT and Graphic User Interface (GUI) clients; however, I will be using git from the command line prompt, which means that we only needgit’s CLT client (at least for now). ↩You can always get a/subscribe for a pro version, but a free would work just fine for now. ↩
If you have already created/imported repositories in/to your
GitHubaccount, give your repository a unique name.GitHubwill inform you if you entered an acceptable and/or available name. ↩Since this option adds a
.gitignoretemplate, it depends on the programming language you intend to use in your project. ↩The
MITLicense is a very common license that is compatible with many copyleft licenses, such as the GNU General Public License (GNU GPL). Any software licensed under the terms of theMITLicense can be integrated with software licensed under the terms of the GNU GPL. Unlike copyleft software licenses, theMITLicense also permits reuse within proprietary software, provided that all copies of the software or its substantial portions include a copy of the terms of theMITLicense and also a copyright notice. ↩