
Introduction:
We introduced Amazon Web Services (AWS) in a previous post, but AWS is not the only cloud service out there. Google Cloud Platform (GCP) consists of a set of physical assets, such as computers and hard disk drives, and virtual resources, such as virtual machines (VMs), that are contained in Google’s data centers around the globe. Therefore, this post will demonstrate deploying an Application Programming Interface (API) on the Google Cloud (gcloud) Platform. For the sake of simplicity, we will not look into the making of an API. Still, we advise interested readers to check the “Controlling and monitoring access to plumber-powered APIs” and the “Deploying plumber-powered APIs with Docker”.
We have demonstrated the deployment of the same API we will use below to AWS in a previous post.
So, in this post, we will:
- discuss the relevance to HTA,
- briefly describe the API we want to host on gcloud,
- briefly explain the docker image, and
- host the API on gcloud.
Relevance, prerequisites and difficulty:
Relevance:
This tutorial merely provides the steps of using another cloud service besides AWS, where we could set our products to be accessible to prospective clients. While we have already discussed the relevance of APIs and containerised applications in previous posts we echo some points again.
If you are new to one or both topics, we recommend you catch up before continuing this post. It is also worth it if it has been a while and you want to brush up on your skills. We argue that this tutorial is relevant to the Health Technology Assessment (HTA) context because it covers getting the API(s) we containerised earlier shipped to the intended end users.
Difficulty:
While we have tried to bring down the technicality in this post, it is fair to rate this post as “intermediate” on the difficulty scale. The main reason behind this classification is that this post requires a good level of understanding of both APIs and containerised applications.
Prerequisites:
First, unless you have a good grasp on API and docker, we recommend that you review:
- the APIs post, and
- the containerised applications post.
Second, we expect you to have the following software installed on your machine:
- Docker desktop client (see here),
- R,
- RStudio, and
- Visual Studio Code.
Finally, we need a Google account that has access to billing information, but we will touch on this point again in a few lines.
We also host the files containing the entire code discussed in this tutorial in the “controlling-and-monitoring-access-to-plumber-powered-APIs” folder on the GitHub repository.
The API we will deploy:
Since this post focuses on the hosting process, we will try to keep this simple and re-use the Smith et al. (2022)1 API we developed further in the “Controlling and monitoring access to plumber-powered APIs” post. Below is a copy of the API code, which is also available in the “controlling-and-monitoring-access-to-plumber-powered-APIs” folder on my GitHub repository.
1
2
3
4
5
6
7
8
9
10
11
12
13
14
15
16
17
18
19
20
21
22
23
24
25
26
27
28
29
30
31
32
33
34
35
36
37
38
39
40
41
42
43
44
45
46
47
48
49
50
51
52
53
54
55
56
57
58
59
60
61
62
63
64
65
66
67
68
69
70
71
72
73
74
75
76
77
78
79
80
81
82
83
84
85
86
87
88
89
90
91
92
93
94
95
96
97
98
99
100
101
102
103
104
105
106
107
108
109
110
111
112
113
114
115
116
117
118
119
120
121
122
123
124
125
126
127
128
129
130
131
132
133
134
135
#################

library(dampack)
library(readr)
library(assertthat)

#* @apiTitle Client API hosting sensitive data
#*
#* @apiDescription This API contains sensitive data, the client does not
#* want to share this data but does want a consultant to build a health
#* economic model using it, and wants that consultant to be able to run
#* the model for various inputs
#* (while holding certain inputs fixed and leaving them unknown).

#* Log some information about the incoming request
#* @filter logger
function(req) {
  cat(
    "Time: ", as.character(Sys.time()), "\n",
    "HTTP verb: ", req$REQUEST_METHOD, "\n",
    "Endpoint: ", req$PATH_INFO, "\n",
    "Request issuer: ", req$HTTP_USER_AGENT, "@", req$REMOTE_ADDR, "\n"
  )
  plumber::forward()
}

#* Check user's credentials in the incoming request
#* @filter security
function(req, res, API_key = "R-HTA-220908") {
  ## Forward requests coming to swagger endpoints:
  if (grepl("docs", tolower(req$PATH_INFO)) |
    grepl("openapi", tolower(req$PATH_INFO))) {
    return(plumber::forward())
  }

  ## Check requests coming to other endpoints:
  ### Grab the key passed in the HEADERS list:
  key <- NULL
  if (!is.null(req$HEADERS["key"])) {
    key <- req$HEADERS["key"]
  }
  ### Check the key passed through with the request object, if any:
  if (is.null(key) | is.na(key)) {
    #### Unauthorised users:
    res$status <- 401 # Unauthorised
    #### Log outcome:
    cat(
      "Authorisation status: 401. API key missing! \n"
    )
    return(list(error = "Authentication required. Please add your API key to the HEADER object using the 'key' value and/or contact API administrator."))
  } else {
    #### Correct credentials:
    if (key == API_key) {
      #### Log outcome:
      cat(
        "Authorisation status: authorised - API key accepted! \n"
      )
      plumber::forward()
    } else {
      #### Incorrect credentials:
      res$status <- 403 # Forbidden
      #### Log outcome:
      cat(
        "Authorisation status: 403. API key incorrect! \n"
      )
      return(list(error = "Authentication failed. Please make sure you have authorisation to access the API and/or contact API administrator."))
    }
  }
}

#* Run the DARTH model
#* @serializer csv
#* @param path_to_psa_inputs is the path of the csv
#* @param model_functions gives the github repo to source the model code
#* @param param_updates gives the parameter updates to be run
#* @post /runDARTHmodel
function(path_to_psa_inputs = "parameter_distributions.csv",
         model_functions = paste0("https://raw.githubusercontent.com/",
                                  "BresMed/plumberHE/main/R/darth_funcs.R"),
         param_updates = data.frame(
           parameter = c("p_HS1", "p_S1H"),
           distribution = c("beta", "beta"),
           v1 = c(25, 50),
           v2 = c(150, 70)
         )) {


  # source the model functions from the shared GitHub repo...
  source(model_functions)

  # read in the csv containing parameter inputs
  psa_inputs <- as.data.frame(readr::read_csv(path_to_psa_inputs))

  # for each row of the data-frame containing the variables to be changed...
  for(n in 1:nrow(param_updates)){

  # update parameters from API input
  psa_inputs <- overwrite_parameter_value(
                            existing_df = psa_inputs,
                            parameter = param_updates[n,"parameter"],
                            distribution = param_updates[n,"distribution"],
                            v1 = param_updates[n,"v1"],
                            v2 = param_updates[n,"v2"])
  }

  # run the model using the single run-model function.
  results <- run_model(psa_inputs)

  # check that the model results being returned are the correct dimensions
  # here we expect a single dataframe with 6 columns and 1000 rows
  assertthat::assert_that(
    all(dim(x = results) == c(1000, 6)),
    class(results) == "data.frame",
    msg = "Dimensions or type of data are incorrect,
  please check the model code is correct or contact an administrator.
  This has been logged"
  )

  # check that no data matching the sensitive csv data is included in the output
  # searches through the results data-frame for any of the parameter names,
  # if any exist they will flag a TRUE, therefore we assert that all = F
  assertthat::assert_that(all(psa_inputs[, 1] %in%
        as.character(unlist(x = results,
                            recursive = T)) == F))

  return(results)

}

#* Scientific paper
#* @preempt security
#* @get /paper
function(){
  return("https://wellcomeopenresearch.org/articles/7-194")
}
The deployment docker image:
To build the deployment docker image, we will make use of the same dockerfile we used in the “Controlling and monitoring access to plumber-powered APIs” tutorial. Below are the contents of that dockerfile.
1
2
3
4
5
6
7
8
9
10
11
12
13
14
# Dockerfile

# Get the docker image provided by plumber developers:
FROM rstudio/plumber
# Install the R package `pacman`:
RUN R -e "install.packages('pacman')"
# Use pacman to install other required packages:
RUN R -e "pacman::p_load('assertthat', 'dampack', 'ggplot2', 'jsonlite', 'readr')"
# Create a working directory in the container:
WORKDIR /api
# Copy API files to the created working directory in the container:
COPY ./RobertASmithBresMed-plumberHE-809f204/darthAPI /api
# Specify the commands to run once the container runs:
CMD ["./plumber.R"]
Install Google Cloud Software Development Kit (SDK):
We need to configure our terminals to work seamlessly with gcloud by installing its Command Line Interface (CLI), which should be straightforward. More information can be found on gcloud’s documentation page, but Windows users can download the installer from here, then follow the prompts after launching it.
However, suppose we were interested in installing gcloud’s SDK through our terminal (or PowerShell in Windows). In that case, we could call the following command and get the same results we could have obtained from executing the installer.
1
2
3
(New-Object Net.WebClient).DownloadFile("https://dl.google.com/dl/cloudsdk/channels/rapid/GoogleCloudSDKInstaller.exe", "$env:Temp\GoogleCloudSDKInstaller.exe")

& $env:Temp\GoogleCloudSDKInstaller.exe
Sign up for a free trial on Google Cloud:
We navigate to https://cloud.google.com/ to create a gcloud account. While Google promised a free gcloud trial, billing information is needed to complete signing up for an account. Below is a glimpse of the landing page of our new gcloud account.
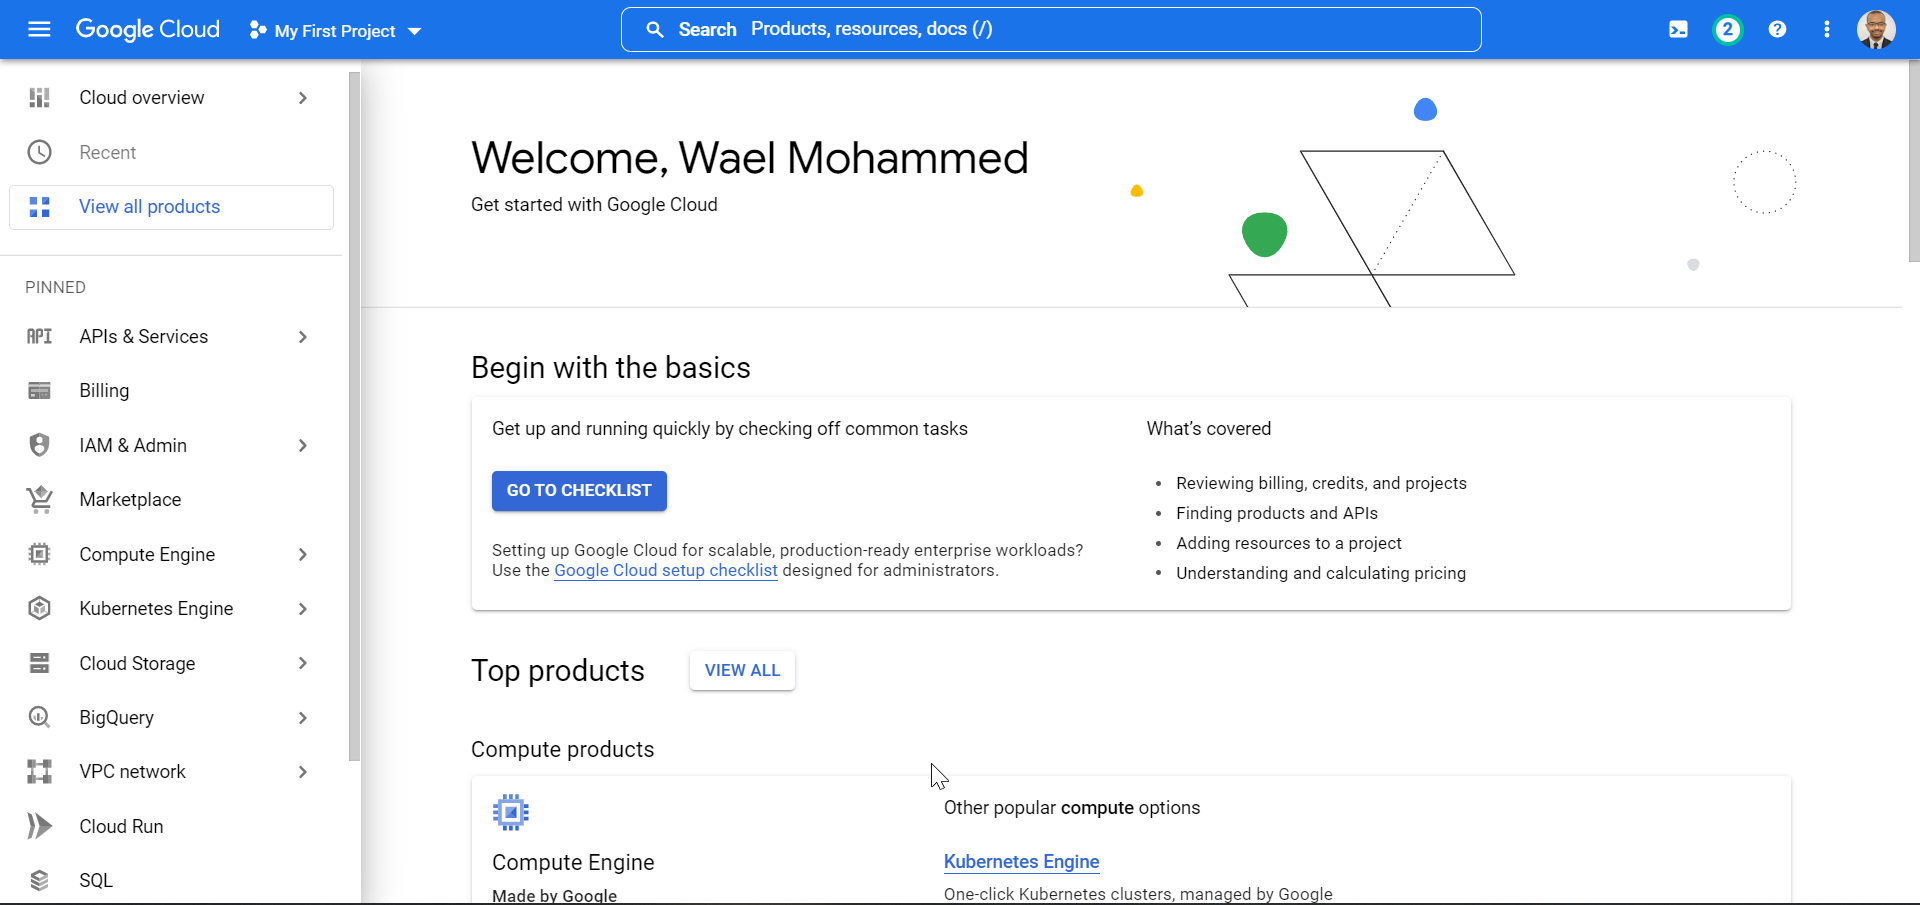 |
|---|
| The landing page of our new Google Cloud account |
Deploying the API on gcloud:
We must go through a few steps before deploying our API on gcloud, which we cover in detail below, but briefly, we need to:
- create a gcloud project for billing and organisational purposes,
- create a repository to host our API image,
- authorise our docker daemon to push our local image to our gcloud repository,
- create, tag, and push our image to our gcloud repository, and
- deploy our containerised API via Cloud Run.
1. Create a new project:
gcloud utilises projects to keep things tidy, so we start with creating a project, which we demonstrate in the following screen recording.
 |
|---|
| Creating our first project on gcloud |
2. Create a repository to host our docker image:
2.1. Enable a docker container registry on gcloud:
There are at least two container registries on gcloud that could handle docker images, Container Registry and Artifact Registry. The former is being phased out, and gcloud recommends we use the latter. Below we show the process of enabling the Artifact Registry API for our project, “livingHTAproject”.
 |
|---|
| Enabling our first project on gcloud |
2.2. Create the repository:
Now that we have enabled a docker container registry service on our gcloud project, we can create a repository to which we will push our docker image. The gif file below displays the steps we carried to create our repository “living-hta-repo” in our “livingHTAproject” project.
 |
|---|
| Creating a docker image repository on gcloud |
3. Authorising our system to communicate with our gcloud account:
3.1. Authenticate our CLI with our gcloud credentials:
To push our image to our gcloud repository, we need to configure gcloud’s CLI with the necessary credentials. Calling the command gcloud auth login launches a web page through which we provide our associated Google account credentials to authorise the login process. This process is captured in the screen recording below.
 |
|---|
| Authorising our CLI to login to our gcloud account |
Once we have signed in to our gcloud account through the CLI, gcloud let us know what credentials it accepted and the project to which it will point our command. So, we need to direct gcloud to the correct project by calling gcloud config set project livinghtaproject. This command uses livinghtaproject, the project id, to properly configure our CLI.
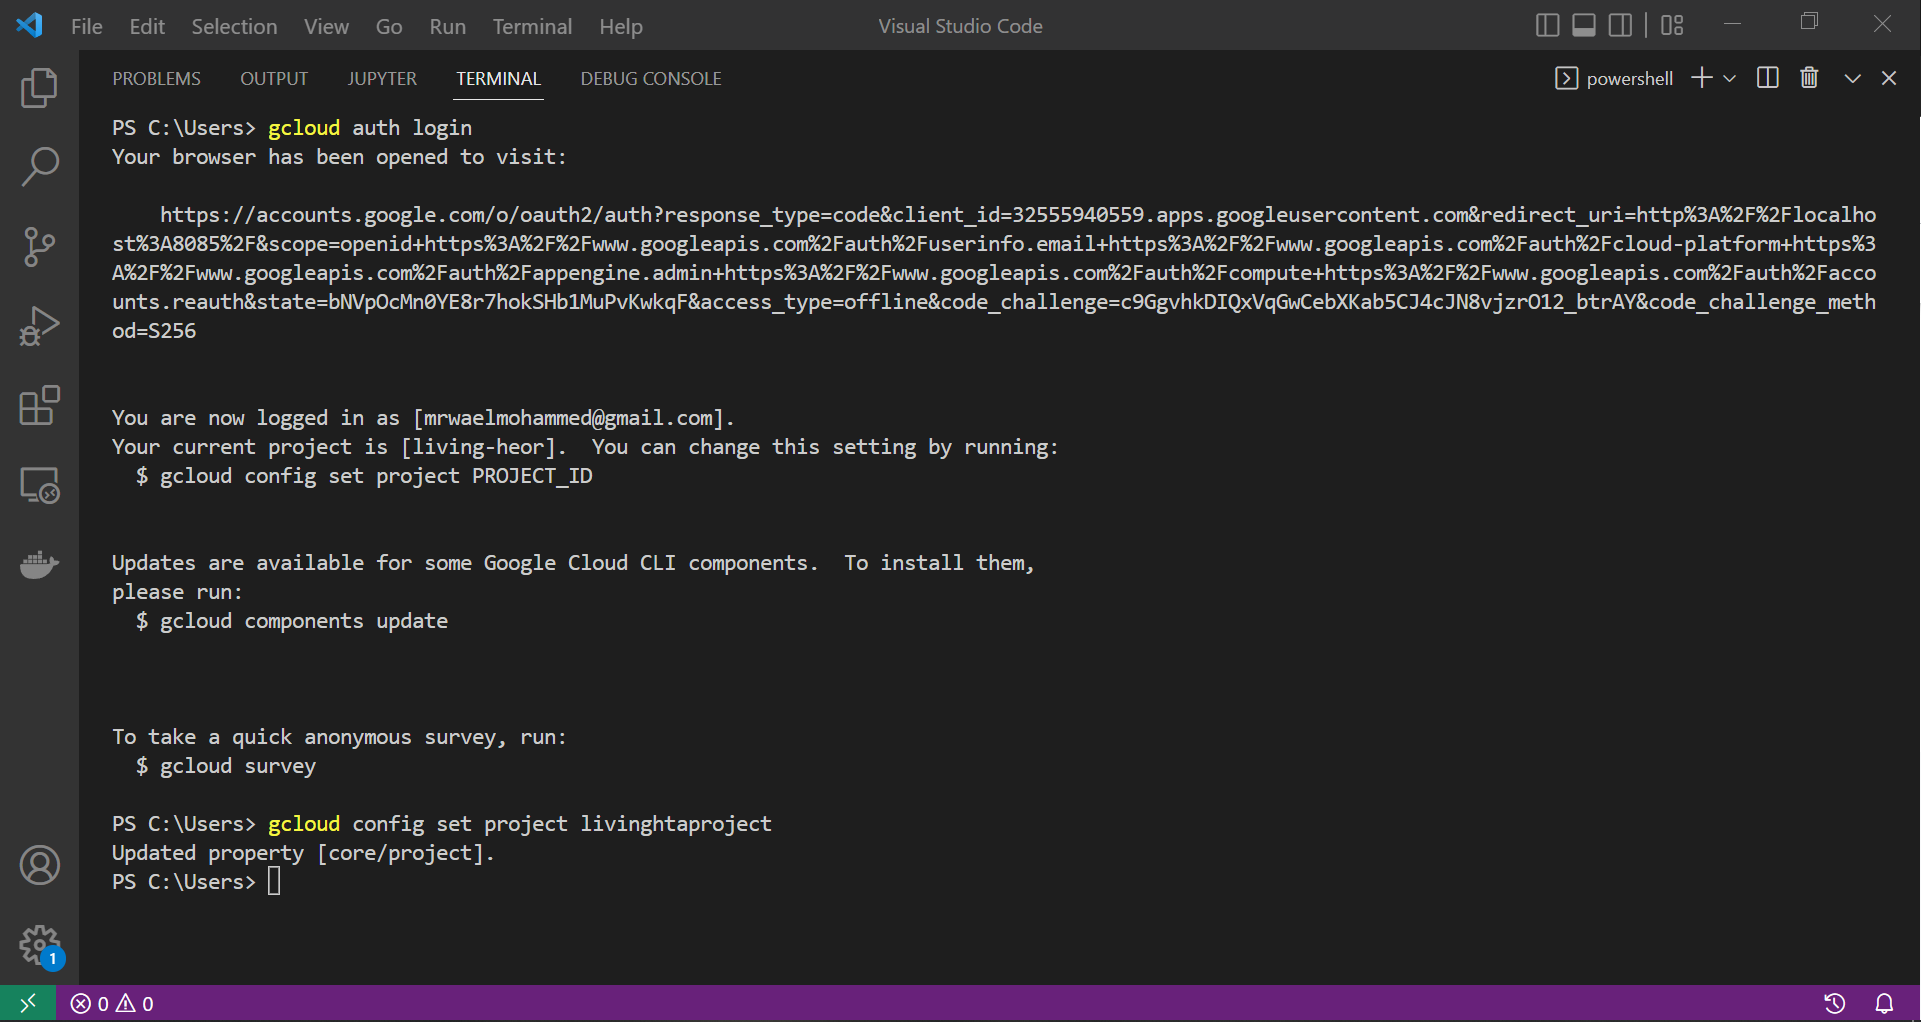 |
|---|
| Setting our gcloud CLI to the intended project |
3.2. Authenticate our docker daemon with gcloud:
As shown below, we will use our docker CLI to push the image. However, we need to configure our docker client by calling the command below for this process to succeed.
1
gcloud auth configure-docker europe-west2-docker.pkg.dev
In the gif file below, gcloud comes back with old configuration metadata stored in our system, which docker asks for confirmation before changing them with the new details.
 |
|---|
| Configuring our docker client to connect with our repository on gcloud |
4. Push our API image to gcloud:
4.1. Build and test the docker image:
To build an image from the earlier described dockerfile, and test it locally, we call:
1
2
3
4
# Build the docker image using the dockerfile mentioned earlier:
docker build --tag living_hta:2.0 --file .\controlling-and-monitoring-access-to-plumber-powered-APIs\Dockerfile .\controlling-and-monitoring-access-to-plumber-powered-APIs
# Spin a container up in the foreground (keep access to the container's inputs and outputs):
docker run -p 8080:8000 -it --rm --name living_hta_api living_hta:2.0
Now that we have tested our image locally, we can proceed with the necessary actions to get it uploaded to our gcloud repository.
4.2. Tag the built image:
Tagging the image we built and tested above allows our docker daemon to push it to the gcloud repository named in the image tag. Notice that the new image name (or tag) looks much like a URL, and this is what docker will use to push the image to the correct repository. In fact, this image’s tag follows the format LOCATION-docker.pkg.dev/PROJECT-ID/REPOSITORY/IMAGE, which translates to europe-west2-docker.pkg.dev/livinghtaproject/living-hta-repo/living_hta_repo:latest.
1
2
3
4
5
6
# Query existing images:
docker image ls
# Tag local image:
docker tag living_hta:2.0 europe-west2-docker.pkg.dev/livinghtaproject/living-hta-repo/living_hta:latest
# See newly tagged image:
docker image ls
In the image tag, living_hta_repo:latest represents the image name, while we can copy the rest from the repository page, as we will demonstrate below.
 |
|---|
| Tagging our local image with a gcloud tag |
4.3. Push the tagged image:
The last step to get our image onto our gcloud repository is to push it by calling the command below.
1
docker push europe-west2-docker.pkg.dev/livinghtaproject/living-hta-repo/living_hta:latest
The screen recording below shows docker starting to push our image to our gcloud repository.
 |
|---|
| Authenticating docker, tagging the API image and starting to push it to ECR |
Below we can see a screen recording confirming that we successfully pushed the image to the living-hta-repo.
 |
|---|
| Authenticating docker, tagging the API image and starting to push it to ECR |
5. Deploy the uploaded image on Cloud Run:
Cloud Run is similar to AWS Elastic Container Services (ECS) but requires fewer inputs when creating and deploying our API docker image. The screen recording below displays the steps we carried to spin a docker container from our API image hosted at gcloud’s project Artifact Repository.
 |
|---|
| Deploying our API container on Cloud Run |
Notice that to set up Cloud Run, we have:
- created a new service,
- on the next page, we then:
- selected the API image hosted on our gcloud repository,
- chose the same region we selected when creating the Artifact Repository,
- under Authentication, we chose “All unauthenticated invocations”,
- under Container, Connections, Security, we clicked on Container, then edited Container port to
8000(the port on which plumber is publishing our API).
Below we see that Cloud Run has successfully started and deployed our API container.
 |
|---|
| Accessing our deployed API |
Notice that unlike what we experienced in AWS, the service URL (https://living-hta-pjfqqc5wua-nw.a.run.app) is a secured (or encrypted) one, starting with https. However, this does not mean that we can not achieve a similar deployment on AWS, but it highlights that our plumber API security was an issue in at least one deployment method on AWS.
On the other hand, notice how we do not need to declare any ports on the service host as we did with our AWS-hosted API here
6. Connect to the API:
We saw in the above gif file that we can connect to the hosted API at “https://living-hta-pjfqqc5wua-nw.a.run.app”; specifically, the API swagger powered-documentations were available at https://living-hta-pjfqqc5wua-nw.a.run.app/__docs__/. Nonetheless, let us test the secure URL programmatically using the same R script we employed in the Controlling and monitoring access to plumber-powered APIs and Deploying a plumber API on AWS tutorials. Moreover, this script embeds the credentials needed to access the secure API endpoint.
As usual, we show the script below and highlight that we have updated the url argument to point to the gcloud hosted API.
1
2
3
4
5
6
7
8
9
10
11
12
13
14
15
16
17
18
19
20
21
# remember to load a package that exports the pipe "%>%":
results <- httr::POST(
  ## the Server URL can also be kept confidential, but will leave here for now:
  url = "https://living-hta-pjfqqc5wua-nw.a.run.app",
  ## path for the API within the server URL:
  path = "/runDARTHmodel",
  ## code is passed to the client API from GitHub:
  query = list(model_functions =
                 paste0("https://raw.githubusercontent.com/",
                        "BresMed/plumberHE/main/R/darth_funcs.R")),
  ## set of parameters to be changed:
  body = list(
    param_updates = jsonlite::toJSON(
      data.frame(parameter = c("p_HS1","p_S1H"),
                 distribution = c("beta","beta"),
                 v1 = c(25, 50),
                 v2 = c(150, 100)))),
  ## pass the API key to the request object:
  config = httr::add_headers(
    key = "R-HTA-220908")) %>%
  httr::content()
 |
|---|
| Interacting with the gcloud hosted API programmatically |
As we can see in the screen recording above, we successfully managed to access our gcloud-hosted API programmatically. However, it might have taken a bit longer than expected to receive a response from the API, which is likely due to the scaling feature that comes with Cloud Run. The image below shows the service status when our R session was programmatically accessing the API; it seems Cloud Run started one container instance right after that request.
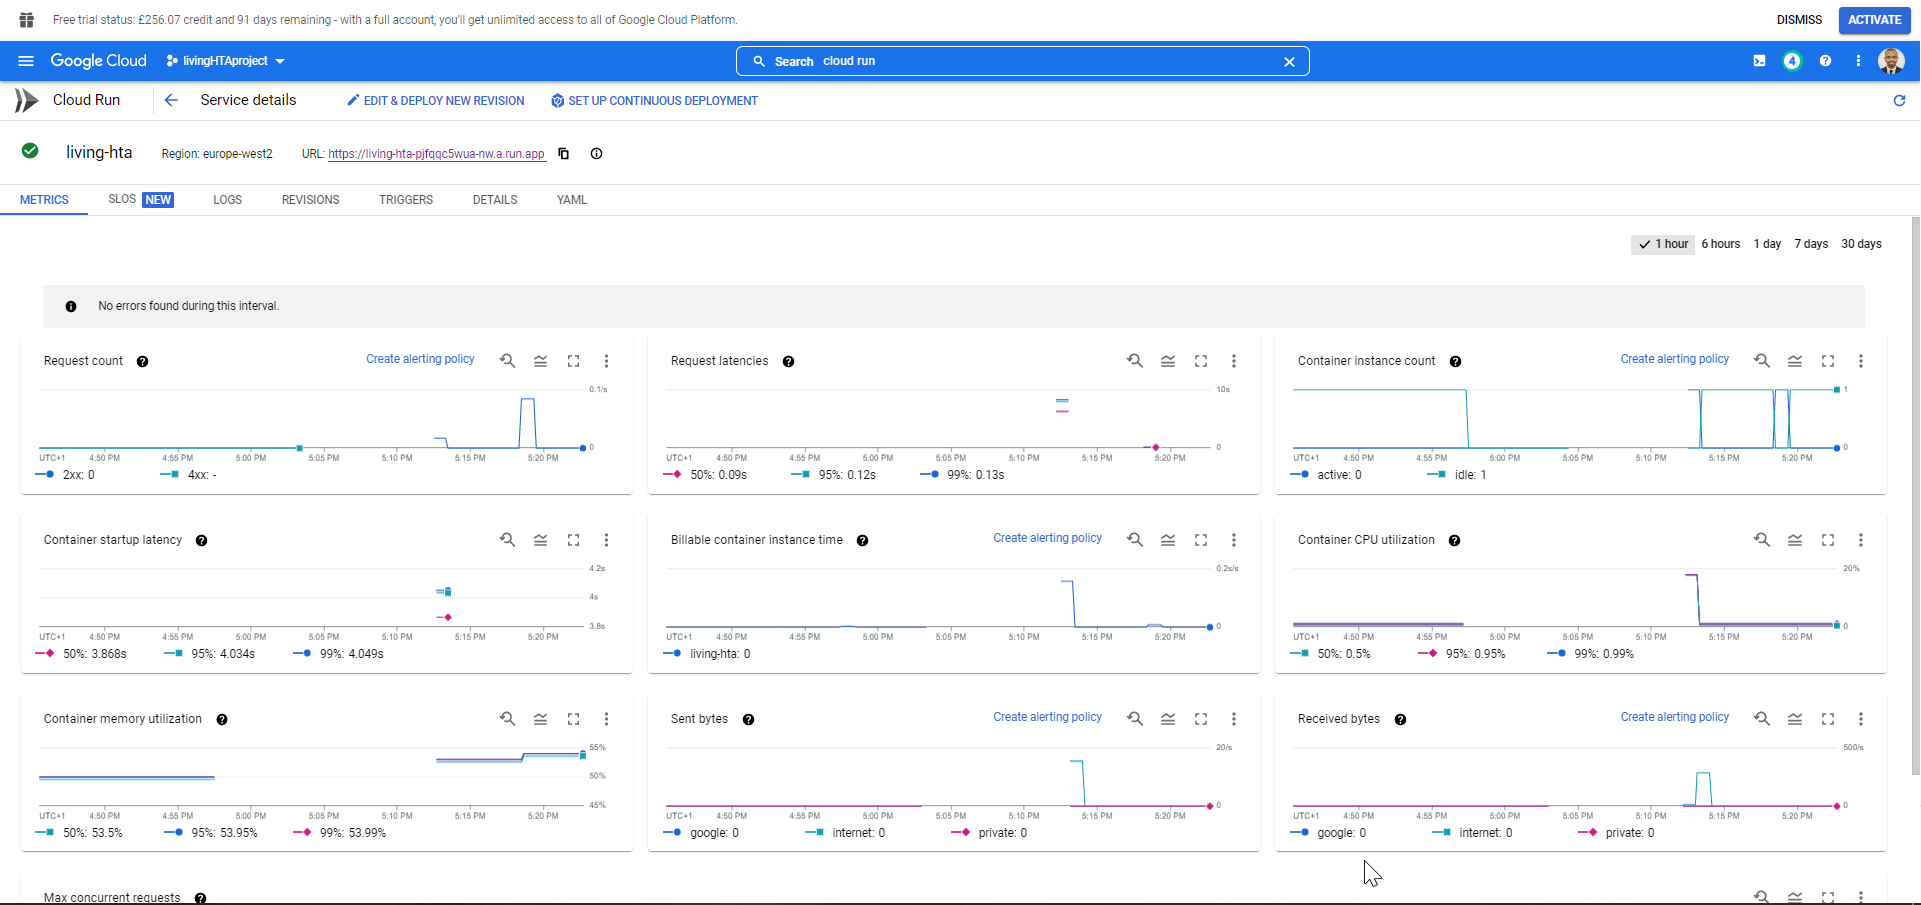 |
|---|
| Cloud Run service auto-scaling |
Cloud Run automatically handles the scaling of the API container, from 0 when no requests are being made to 100 when our API serves too many customers simultaneously.
Cleaning up:
Now that we have concluded publishing our API on gcloud, we will remove the repository and Cloud Run service from our gcloud account to avoid any financial implications they may bring.
Conclusion:
In this post, we demonstrated hosting a plumber-powered API on gcloud. However, we must stress that this tutorial was merely an example of how to deploy services on gcloud, but not the only way to do so. We could have published the same API on gcloud via other methods, including spinning a cloud cluster and running a docker container manually.
While we acknowledge that the process might change in time, we hope that the information in this post will help interested readers get their products deployed on the Google Cloud Platform.
Sources:
Smith RA, Schneider PP and Mohammed W. Living HTA: Automating Health Economic Evaluation with R. Wellcome Open Res 2022, 7:194 (https://doi.org/10.12688/wellcomeopenres.17933.2). ↩