
Introduction:
As we discussed in a previous post, containers provide a great solution for the cross-platform development, collaboration and deployment dilemma. Moreover, we also mentioned that a great example of software that allows our machines to host containers is Docker.
Repast for High-Performance Computing (Repast HPC) is a cross-platform C++ library that facilitates the development of Agent-Based Models (ABM)s. However, as the name suggests, Repast HPC is built for high computing workstations, clusters, or supercomputers which usually run macOS, Linux, or Unix. Therefore, a containerised Repast HPC development environment seems like a good solution for those interested in creating an ABM but:
- do not have the correct Operating System (OS),
- are missing the other required dependencies, or
- do not want to install it on their machines.
So, in this post, we will:
- discuss the relevance to HTA,
- script the dockerfile,
- build the image,
- host the image on the cloud, and
- run the container.
Relevance, prerequisites and difficulty:
Relevance:
We started this post by highlighting that the Repast HPC library is key for ABMs’ development and deployment in HPCs. ABMs are one of the modelling methodologies we employ in the appraisal of Public Health Technologies. On the other hand, we have covered the relevance of containerised applications, in general, in a previous post.
Difficulty:
We rank this tutorial as advanced owing to the background knowledge and skills it builds upon and the technical bits it covers.
Prerequisites:
We expect those who intend to follow along to:
- understand the basics of containerised applications (please see here for a quick recap),
- understand the use of docker in creating images and running containers (please see here for a quick recap), and
- have Docker Engine installed in their systems.
Moreover, having the Visual Studio Code (VS code) Integrated Development Environment (IDE) is beneficial but unnecessary. Finally, we call or execute the below-mentioned commands on a Windows 10 machine. Hence, we advise those running other OSs to check the references and further resources at the very end of this post.
The files containing the code we demonstrate below are hosted here. Cloning this repository should assist those interested in running the commands outlined below.
The Repast HPC docker-based environment:
Creating the Repast HPC image is slightly complicated, and it would be challenging, if possible, to build it by calling the required commands from the terminal. Therefore, a dockerfile is the best, if not the only, solution to develop our environment and reproduce it elsewhere. Below we start with discussing the instructions we need to build the image successfully.
The Repast HPC dockerfile:
Let us start working on our dockerfile before we move on to building the image and testing it. We first show snippets of the dockerfile to aid the discussion, but we present the entire code afterwards.
Image base-layer:
There is at least one other Repast HPC docker image online. This image is based on the Linux distribution Alpine, but the versions of both the base image and the Repast HPC library are relatively old. Therefore, for the two versions of this development environment we use versions 22.10 and 3.16.2 of the Linux distributions Ubuntu and Alpine, respectively, from their respective (Linux and Alpine) official Docker Hub image repository pages. The code snippets we discuss below are part of the Ubuntu-based development environment; however, we show the complete dockerfiles for both development environments in the Code section below.
1
2
3
4
5
# Declare the version of ubuntu's base image:
ARG UBUNTU_VERSION="22.10"

# Start from an ubuntu official image:
FROM ubuntu:${UBUNTU_VERSION}
Perhaps this is the best place to highlight that ARG is the only instruction that can precede the FROM one. Therefore, on this occasion, we use the ARG instruction to set the value of the “UBUNTU_VERSION” variable, representing the version of the base layer or ubuntu. We then employ this variable in the FROM instruction for docker to use the “ubuntu:22.10” image as the base layer.
It might be worth noting that we use the ARG instruction in this fashion to theoretically allow us to create a new version of the development environment from the latest base-layer (ubuntu) version just by changing the value of the UBUNTU_VERSION variable.
Image metadata:
There are a few advantages to adding metadata to our docker image. One of these advantages is that it allows the container registry (the cloud service that hosts our docker image) to link the image to the repository housing the instructions’ dockerfile.
1
2
3
4
5
6
7
8
# Declare image metadata:
LABEL org.opencontainers.image.title="Repast for High Performance Computing (Repast HPC) 2.3.1 docker image"
LABEL org.opencontainers.image.authors="Wael Mohammed <wmamohammed1@sheffield.ac.uk>"
LABEL org.opencontainers.image.url="https://github.com/W-Mohammed/docker-repast-hpc/pkgs/container/repast-hpc"
LABEL org.opencontainers.image.source="https://github.com/W-Mohammed/posts/tree/main/creating-a-docker-based-Repast-HPC-development-environment/Ubuntu"
LABEL org.opencontainers.image.base.name="https://hub.docker.com/layers/ubuntu/library/ubuntu/22.10/images/sha256-75d11da998393ed4a786917130c205967123f7ca8cddce2889fd9e3a0a69fcdd?context=explore"
LABEL org.opencontainers.image.description="This image provides a Repast HPC development environment.\
    The authors of this image adapted it from https://github.com/eze1981/repast-hpc/blob/master/Dockerfile"
We use the LABEL instruction, in the format LABEL key="value", to provide the necessary metadata. Moreover, container registries require that the keys conform to a specific format that can be found here. For example, one important key is the org.opencontainers.image.source, which allows the GitHub Container Registry to link the image to the GitHub repository that contains the dockerfile.
Install base-layer dependencies:
The Repast HPC library requires a few dependencies; however, the code chunk below installs other prerequisites (dependencies of the dependencies).
1
2
3
4
5
6
7
# Install system dependencies:
RUN apt update -y && \
    apt upgrade -y git \
    build-essential \
    zlib1g-dev \
    libgtest-dev \
    curl
In addition to the system dependencies, we add the version control tool git to the image, as seen in the chunk above.
Install Repast HPC and its dependencies:
Next, we add the instructions docker needs to download, unpack and install Repast HPC and its dependencies. We see below that we make use of the ARG instruction in a similar fashion to how we discussed earlier with the base-layer version.
In the instructions below we:
- declare version
2.3.1as the value for the “RHPC_VERSION” variable using the ARG instruction, - create and declare a new temporary working directory using the WORKDIR instruction,
- download and unpack the declared version of Repast HPC using the RUN instruction,
- move to the “MANUAL_INSTALL” subfolder inside the unpacked Repast HPC folder,
- make the location of the “MPICH/bin” folder available for Repast HPC and its dependencies to install correctly using the ENV instruction,
- install the Repast HPC dependencies, and
- install the Repast HPC.
1
2
3
4
5
6
7
8
9
10
11
12
13
14
15
16
17
18
19
20
21
22
23
24
# Repast HPC (rhpc):
## Declare the version of rhpc to be installed:
ARG RHPC_VERSION="2.3.1"

## Create temporary directory and set as working directory:
WORKDIR /tmp/repast-hpc-src

## Download, build, and install rhpc:
RUN curl -O -L github.com/Repast/repast.hpc/releases/download/v${RHPC_VERSION}/repast_hpc-${RHPC_VERSION}.tgz && \
    tar -xvzf repast_hpc-${RHPC_VERSION}.tgz

## Create temporary directory and set as working directory:
WORKDIR /tmp/repast-hpc-src/repast_hpc-${RHPC_VERSION}/MANUAL_INSTALL

## Add MPICH bin to the PATH:
ENV PATH="/root/sfw/MPICH/bin:${PATH}"

## Install repast hpc dependencies:
RUN ./install.sh mpich && \
    ./install.sh netcdf && \
    ./install.sh boost

## Install repast rhpc:
RUN ./install.sh rhpc
But let us dissect the previous set of instructions further:
- curl: There are at least two ways to download files in
Linux. We could have used thewgetcommand; however, sincecurlis one of the Repast HPC dependencies, we decided to use it to download the required files. Moreover, we use the flags-Oto tellcurlto save the file as is and-Lto allowcurlto deal with any redirection (for example from HTTP to HTTPS). - tar: We used this command to extract or unpack the download compressed file. Whereas we used the
-xvzfflags:-xor extract: to extract the files from the archive,-vor verbose: to list all files as they are processed,-zor uncompress, and-for file: to use the tar file named after the flag.
- The ENV instruction, which follows the format
ENV <key>=<value>, sets the environment variableto the value . This will be in the environment for all subsequent instructions in the build stage. - The
shellfileinstall.shcontains the terminal commands provided with the Repast HPC package to complete the installation. However, the script employs conditional statements to control which package/library to install. Moreover,bash, the software that processes.shfiles, will expect one parameter (mpich,netcdf,boostorrhpc) after the name of the file, and it uses this parameter to install the named package. For example:./install.sh mpich,./install.sh netcdf,./install.sh boost, and./install.sh rhpcwould trigger the installation ofmpich,netcdf,boostandrhpc, respectively.
Similar to what we highlighted earlier, the ARG instruction should allow us to create a new version of the development environment using the latest Repast HPC version just by updating the value of the RHPC_VERSION variable.
Tidy up files and packages:
Next, we add some instructions to clean up unneeded files and packages. We also add the destinations of the Repast HPC libraries to ldconfig1
1
2
3
4
5
6
7
8
9
10
11
12
13
14
# Remove unneeded packages:
RUN apt remove -y build-essential && \
    apt autoremove -y

# Pass the libraries directories to ld
RUN ldconfig /root/sfw/boost-1_61_0/lib \
             /root/sfw/repast_hpc-2.3.1/lib \
             /root/sfw/netcdf-4.2.1.1/lib \
             /root/sfw/netcdf-cxx-4.2/lib \
             /root/sfw/MPICH/lib

# Remove unneeded files:
WORKDIR /
RUN rm -rf /tmp/*
Adding a working directory:
Finally, we end the dockerfile by:
- creating a working directory named project,
- copying Repast HPC built-in examples to a subfolder named examples, and
- concluded the build-up process by calling
bashfrom the project working directory.
1
2
3
4
5
6
7
8
9
# Setup a project file:
## Create the "project" folder as a working directory:
WORKDIR /project

## Copy rhpc example files to a folder called "examples" in the "project" directory:
RUN cp -v -T -r /root/sfw/repast_hpc-${RHPC_VERSION}/bin /project/examples

# Declare start-up command:
CMD ["/bin/bash"]
We invoked the copying process by calling the cp command. This command uses the flags:
-v: to list all files as they are processed,-T: to copy the contents of the source destination (not the folder itself) into the target, and-r: to recursively copy a directory and its contents (which could be files or other subdirectories). However, given the-Tflag, only the directory contents are copied.
Building the image on our local machine:
Using the dockerfile to build an image should be straightforward. Assuming we have cloned the GitHub repository that contains the dockerfile, we can use the command below to create and tag our image.
1
docker build --tag repast-hpc ./creating-a-docker-based-Repast-HPC-development-environment/Ubuntu
 |
|---|
| Building a version of the Repast HPC image from a dockerfile |
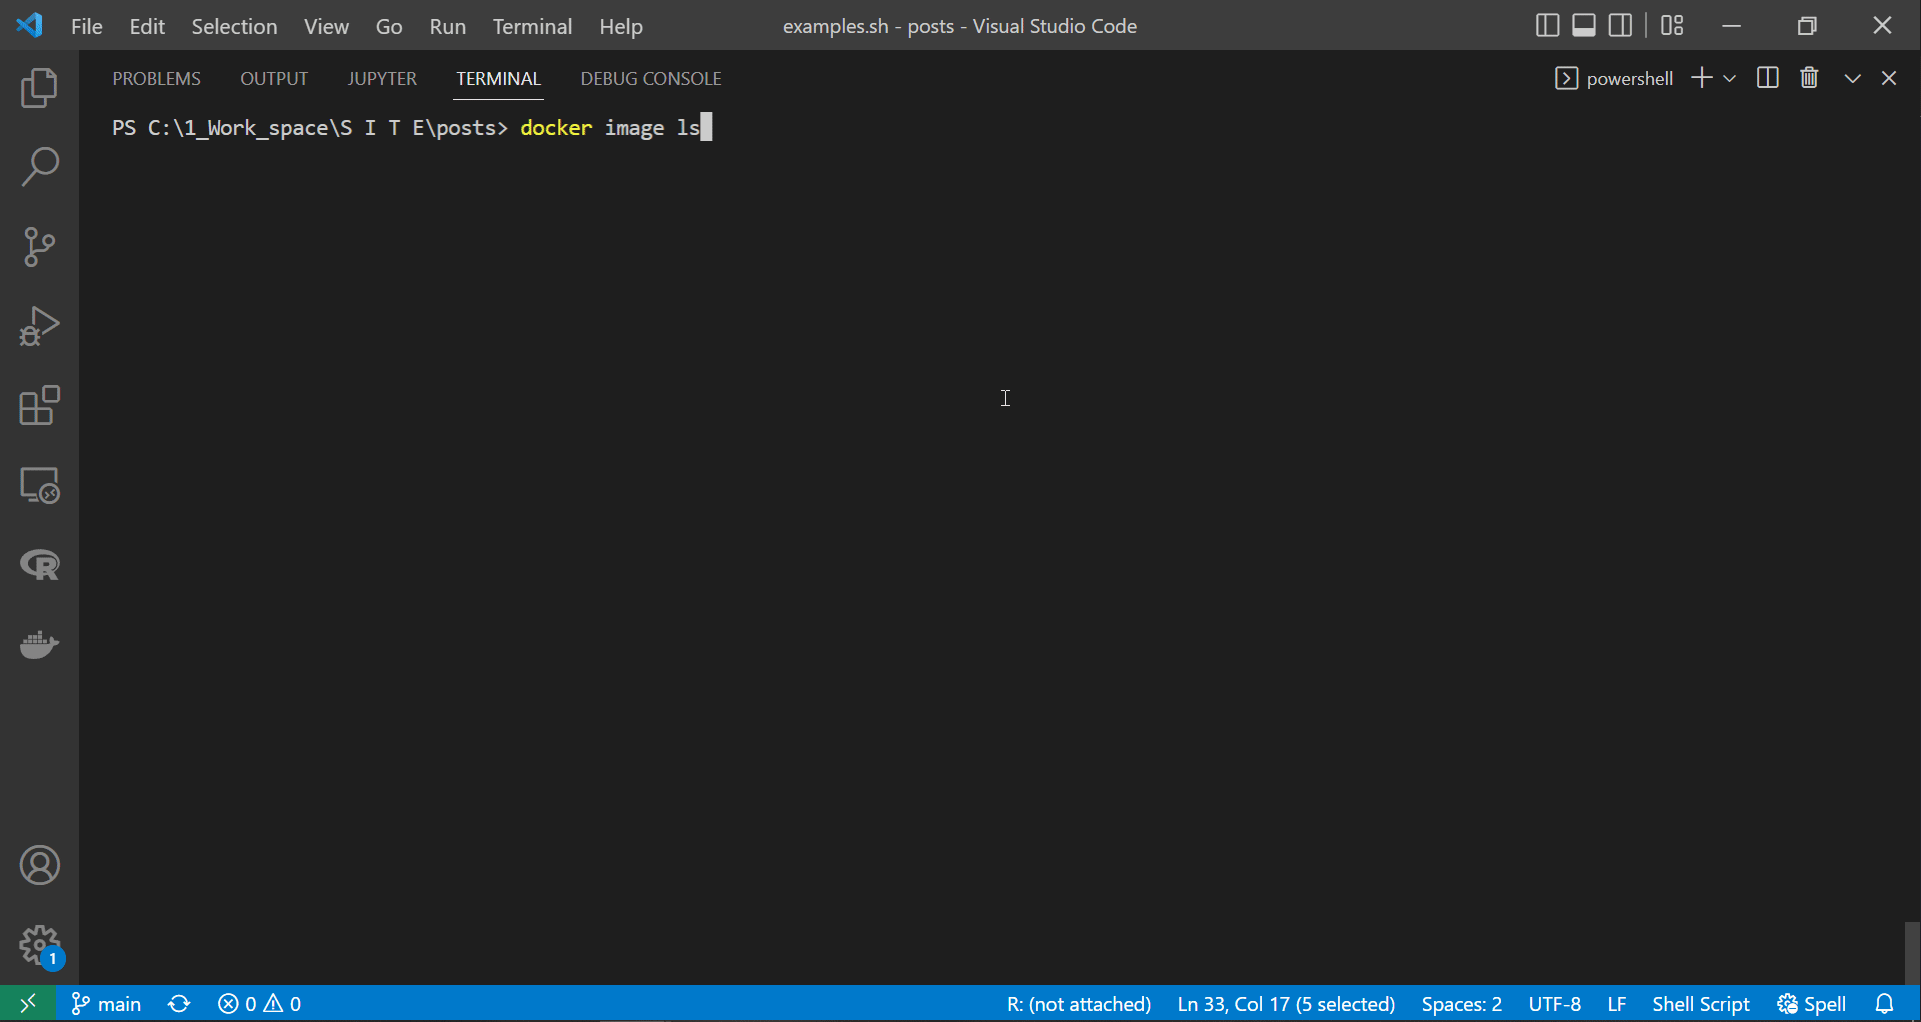
We can use the image subcommand to list the images in our local machine.
1
docker image ls
Pushing the image to the cloud:
Now that we have built the Repast HPC development environment image, we can push it to a Container Registry Service and make it available to others. One popular service is GitHub Container Registry (ghcr). To push the image to ghcr:
- create a GitHub account,
- create a personal access token (PAT) to use in the command line,
- save it as a temporary environment variable using the command
$env:GH_CR_TOKEN="KEY"on Windows PowerShell, - sign in to ghcr.io using the command
docker login, - tag the image using
docker image tag, and - push the image to ghcr.io using the
docker image pushcommand.
1
2
3
4
5
6
7
8
9
10
11
12
13
14
15
# Environment variable:
## Save PAT as an environment variable (replace KEY with the GitHub's PAT):
$env:GH_CR_TOKEN="KEY"
## Print the PAT (variables are reset after a sign-out/log-out):
echo $env:GH_CR_TOKEN
$env:GH_CR_TOKEN
# Login docker to our GitHub Container Registry service:
## On our main machine (-p is for, and can be replaced by, --password):
docker login ghcr.io -u W-Mohammed -p $env:GH_CR_TOKEN
## On our second Windows machine:
$env:GH_CR_TOKEN | docker login ghcr.io -u W-Mohammed --password-stdin
# Tag the image (changing it from repast-hpc to ghcr.io/w-mohammed/repast-hpc:2.3.1-ubuntu22.10):
docker image tag repast-hpc ghcr.io/w-mohammed/repast-hpc:2.3.1-ubuntu22.10
# Push the image to GitHub Container Registry (ghcr.io):
docker image push ghcr.io/w-mohammed/repast-hpc:2.3.1-ubuntu22.10
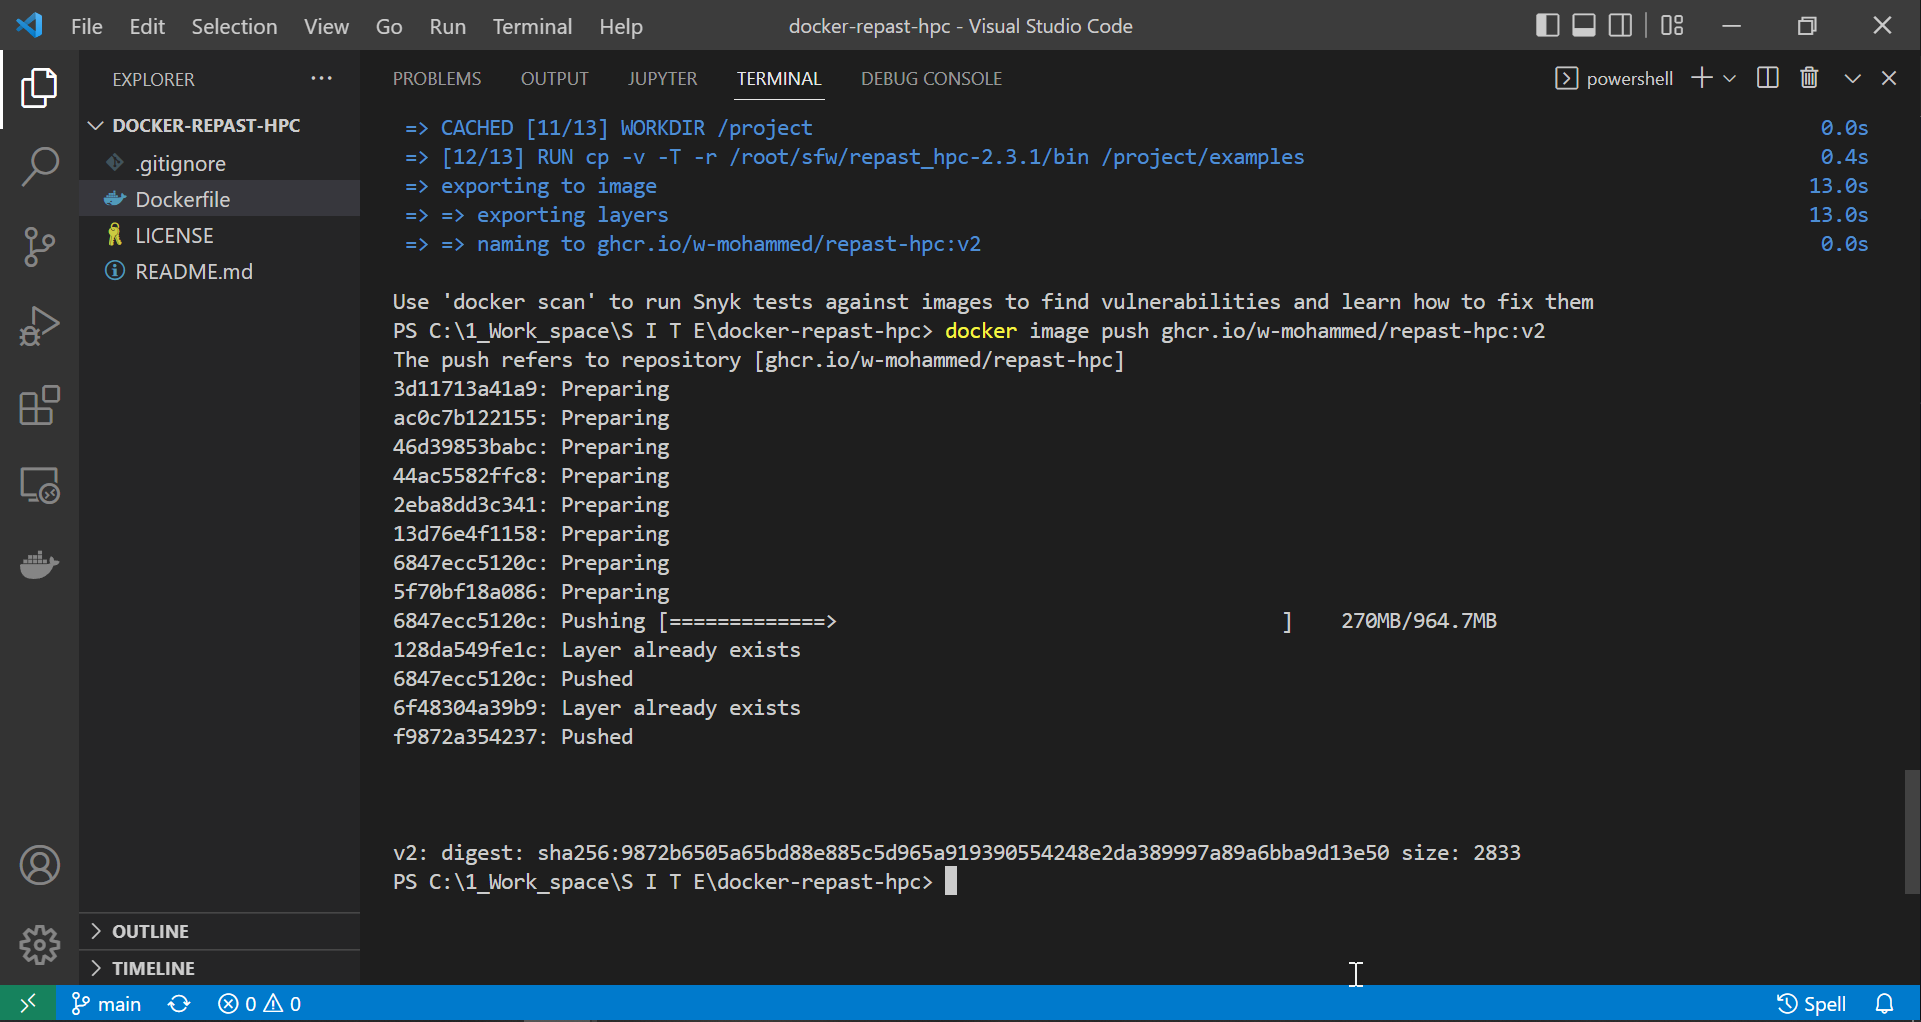 |
|---|
| Pushing a version of the Repast HPC image to ghcr.io |
We can check that we correctly set the environment variable by calling the command $env:GH_CR_TOKEN or echo $env:GH_CR_TOKEN. Also, in Linux, we can set an environment variable using export GH_CR_TOKEN=KEY.
On a different note, we may not need to tag the image if we named it or tag it using ghcr.io/w-mohammed/repast-hpc:2.3.1-ubuntu22.10 when we were building it.
The command $env:GH_CR_TOKEN | docker login ghcr.io -u W-Mohammed --password-stdin did not work as expected on our main machine, but docker login ghcr.io -u W-Mohammed -p $env:GH_CR_TOKEN worked fine (despite the security warning not to use a password in the command line). However, the former command worked fine on our other Windows computer. On the other hand, Linux users can sign in to ghcr.io using echo GH_CR_TOKEN | docker login ghcr.io -u W-Mohammed --password-stdin.
The tag child command expects the format NAME:TAG where TAG usually refers to the version of the image (for example: 2.3.1-ubuntu22.10). NAME, in this case, is a combination of:
- the Container Registry service
ghcr.io, - the GitHub username
w-mohammed, and - the repository name
repast-hpc.
We can find all pushed versions of the images on this containers’ page; whereas we have also saved a clean version of the dockerfiles here.
Creating containers from the image:
Let us remove the image we built earlier from our local machines before we can test pulling it back from ghcr.io.
1
2
3
4
5
6
7
8
9
10
11
# List existing images:
docker image ls
# Remove the previous image:
## either:
docker image remove ghcr.io/w-mohammed/repast-hpc:2.3.1-ubuntu22.10
## or:
docker image rm ghcr.io/w-mohammed/repast-hpc:2.3.1-ubuntu22.10
# Pull the image from GitHub Container Registry:
docker pull ghcr.io/w-mohammed/repast-hpc:2.3.1-ubuntu22.10
# Check if the image was pulled locally:
docker image ls
Now that we have the image back in our local machines, we can use it to run a development environment. Since this is a development environment, it would make sense that we pass model files to and from the container. Docker allows us to complete this process if we mount the folder containing our ABM files to the container. Subsequently, changes to the mounted directory and its contents will show on both the container’s and host’s storage.
Assuming we have cloned the git repository accompanying this post from here, we can run the following command to mount the creating-a-docker-based-Repast-HPC-development-environment/Ubuntu folder to the container.
1
2
3
4
# Move to the posts/creating-a-docker-based-Repast-HPC-development-environment/Ubuntu folder:
cd ./creating-a-docker-based-Repast-HPC-development-environment/Ubuntu
# Run a container mounting the current directory to the folder "mounted" inside the "project" folder:
docker run --rm -it -v ${PWD}:/project/mounted ghcr.io/w-mohammed/repast-hpc:2.3.1-ubuntu22.10
The folder we mounted to the container contains a shell file that we scripted to help run the Repast HPC built-in examples. Once the container starts spinning we can:
- call
./examples.sh Rumorto run the Rumor ABM example, or - call
./examples.sh Zombiesto run the Zombies ABM example.
1
2
3
4
# Run the "Rumor" ABM:
./mounted/examples.sh Rumor
# Run the "Zombies" ABM:
./mounted/examples.sh Zombies
Below we demonstrate creating a container and running the ABM examples.
 |
|---|
| Pulling the Repast HPC image from ghcr.io & running ABM examples on a container |
Employing the Repast HPC as a base layer in other images:
This process is not that different from what we did earlier when scripting the Repast HPC dockerfile. The command would be:
1
FROM ghcr.io/w-mohammed/repast-hpc:2.3.1-ubuntu22.10
Code:
Below we put together the complete code that we also have in the dockerfiles in this repository.
Ubuntu-based version of the Repast HPC development environment:
1
2
3
4
5
6
7
8
9
10
11
12
13
14
15
16
17
18
19
20
21
22
23
24
25
26
27
28
29
30
31
32
33
34
35
36
37
38
39
40
41
42
43
44
45
46
47
48
49
50
51
52
53
54
55
56
57
58
59
60
61
62
63
64
65
66
67
68
69
70
71
72
73
74
75
76
# Dockerfile

# This dockerfile contains the instructions required to build a Repast HPC image powered by Ubuntu Linux.

# Declare the version of ubuntu's base image:
ARG UBUNTU_VERSION="22.10"

# Start from an ubuntu official image:
FROM ubuntu:${UBUNTU_VERSION}

# Declare image metadata:
LABEL org.opencontainers.image.title="Repast for High Performance Computing (Repast HPC) 2.3.1 docker image"
LABEL org.opencontainers.image.authors="Wael Mohammed <wmamohammed1@sheffield.ac.uk>"
LABEL org.opencontainers.image.url="https://github.com/W-Mohammed/docker-repast-hpc/pkgs/container/repast-hpc"
LABEL org.opencontainers.image.source="https://github.com/W-Mohammed/posts/tree/main/creating-a-docker-based-Repast-HPC-development-environment/Ubuntu"
LABEL org.opencontainers.image.base.name="https://hub.docker.com/layers/ubuntu/library/ubuntu/22.10/images/sha256-75d11da998393ed4a786917130c205967123f7ca8cddce2889fd9e3a0a69fcdd?context=explore"
LABEL org.opencontainers.image.description="This image provides a Repast HPC development environment.\
    The authors of this image adapted it from https://github.com/eze1981/repast-hpc/blob/master/Dockerfile"

# Install system dependencies:
RUN apt update -y && \
    apt upgrade -y git \
    build-essential \
    zlib1g-dev \
    libgtest-dev \
    curl

# Repast HPC (rhpc):
## Declare the version of Repast HPC (rhpc) to be installed:
ARG RHPC_VERSION="2.3.1"

## Set a temporary working directory:
WORKDIR /tmp/repast-hpc-src

# Download the rhpc compressed file:
RUN curl -O -L https://github.com/Repast/repast.hpc/releases/download/v${RHPC_VERSION}/repast_hpc-${RHPC_VERSION}.tgz && \
    tar -xvzf repast_hpc-${RHPC_VERSION}.tgz

# Move working directory to the installation folder:
WORKDIR /tmp/repast-hpc-src/repast_hpc-${RHPC_VERSION}/MANUAL_INSTALL

# Add MPICH bin to the PATH:
ENV PATH="/root/sfw/MPICH/bin:${PATH}"

# Install repast hpc dependencies:
RUN ./install.sh mpich && \
    ./install.sh netcdf && \
    ./install.sh boost

# Install repast hpc:
RUN ./install.sh rhpc

# Remove unneeded packages:
RUN apt remove -y build-essential && \
    apt autoremove -y

# Pass the libraries directories to ld
RUN ldconfig /root/sfw/boost-1_61_0/lib \
             /root/sfw/repast_hpc-2.3.1/lib \
             /root/sfw/netcdf-4.2.1.1/lib \
             /root/sfw/netcdf-cxx-4.2/lib \
             /root/sfw/MPICH/lib

# Remove unneeded files:
WORKDIR /
RUN rm -rf tmp

# Setup a project file:
## Create the "project" folder as a working directory:
WORKDIR /project

## Copy rhpc example files to a folder called "examples" in the "project" directory:
RUN cp -v -T -r /root/sfw/repast_hpc-${RHPC_VERSION}/bin /project/examples

# Declare start-up command:
CMD ["/bin/bash"]
Alpine-based version of the Repast HPC development environment:
1
2
3
4
5
6
7
8
9
10
11
12
13
14
15
16
17
18
19
20
21
22
23
24
25
26
27
28
29
30
31
32
33
34
35
36
37
38
39
40
41
42
43
44
45
46
47
48
49
50
51
52
53
54
55
56
57
58
59
60
61
62
63
64
65
66
67
68
69
# Dockerfile

# This dockerfile contains the instructions required to build a Repast HPC image powered by Alpine Linux.

# Declare the version of alpine's base image:
ARG ALPINE_VERSION="3.16.2"

# Start from an alpine official image:
FROM alpine:${ALPINE_VERSION}

# Declare image metadata:
LABEL org.opencontainers.image.title="Repast for High Performance Computing (Repast HPC) 2.3.1 docker image"
LABEL org.opencontainers.image.authors="Wael Mohammed <wmamohammed1@sheffield.ac.uk>"
LABEL org.opencontainers.image.url="https://github.com/W-Mohammed/docker-repast-hpc/pkgs/container/repast-hpc"
LABEL org.opencontainers.image.source="https://github.com/W-Mohammed/posts/tree/main/creating-a-docker-based-Repast-HPC-development-environment/Alpine"
LABEL org.opencontainers.image.base.name="https://hub.docker.com/layers/alpine/library/alpine/3.16.2/images/sha256-1304f174557314a7ed9eddb4eab12fed12cb0cd9809e4c28f29af86979a3c870?context=explore"
LABEL org.opencontainers.image.description="This image provides a Repast HPC development environment.\
    The authors of this image adapted it from https://github.com/eze1981/repast-hpc/blob/master/Dockerfile "

# Install system dependencies:
RUN apk add --no-cache --update \
    bash \
    openssl \
    ca-certificates \
    curl \
    gcc \
    make \
    g++ \
    zlib-dev \
    git

# Repast HPC (rhpc):
## Declare the version of rhpc to be installed:
ARG RHPC_VERSION="2.3.1"

## Create temporary directory and set as working directory:
WORKDIR /tmp/repast-hpc-src

## Download, build, and install rhpc:
RUN curl -O -L github.com/Repast/repast.hpc/releases/download/v${RHPC_VERSION}/repast_hpc-${RHPC_VERSION}.tgz && \
    tar -xvzf repast_hpc-${RHPC_VERSION}.tgz

## Create temporary directory and set as working directory:
WORKDIR /tmp/repast-hpc-src/repast_hpc-${RHPC_VERSION}/MANUAL_INSTALL

## Add MPICH bin to the PATH:
ENV PATH="/root/sfw/MPICH/bin:${PATH}"

## Install repast hpc dependencies:
RUN ./install.sh mpich && \
    ./install.sh netcdf && \
    ./install.sh boost

## Install repast rhpc:
RUN ./install.sh rhpc

# Remove unneeded files:
WORKDIR /
RUN rm -rf /tmp/*

# Setup a project file:
## Create the "project" folder as a working directory:
WORKDIR /project

## Copy rhpc example files to a folder called "examples" in the "project" directory:
RUN cp -v -T -r /root/sfw/repast_hpc-${RHPC_VERSION}/bin /project/examples

# Declare start-up command:
CMD ["/bin/sh"]
Conclusion:
This post discussed the code we used to build a couple of images and how to use the resulting containers. We believe this tutorial packs the knowledge, demonstrates the skills and discusses the tools one may require to create a docker image and use it constructively.
Sources:
- Official Alpine images
- Install c++, g++ and gcc in Alpine Linux
- The
curlcommand - GitHub Container Registry
ldconfigis a utility that indexes shared object names to simplify loading on shared object libraries by executables. ↩